Difference between revisions of "HowTo:Use POV-Ray with Blender"
m |
|||
| (62 intermediate revisions by the same user not shown) | |||
| Line 1: | Line 1: | ||
| − | + | {{MoreDetails|Features| | |
| + | Some key features of the exporter include: | ||
| + | * Geometry import and export with their modifiers, keyed and physics animation | ||
| + | * Add POV-Ray specific non mesh primitives (never show tesselation) | ||
| + | * Instances | ||
| + | * Hair particles | ||
| + | * Smoke simulations | ||
| + | * Atmospheric media (volume fog) | ||
| + | * HDRI environment mapping | ||
| + | * Aperture depth of field | ||
| + | * Material properties such as filtering, emission, translucency, subsurface scattering, glass fog (tinted absorption), blurry/glossy reflections... | ||
| + | * Procedural textures (emulated from Blender Internal and POV-Ray native) | ||
| + | * Image textures | ||
| + | * Texture influence channels: Alpha ; Diffuse ; Bump ; Specular ; Mirror (uses same channel as specular) | ||
| + | * Global Illumination: Radiosity (Indirect Lighting) ; Photons caustics (reflect/refract); meshlights | ||
| + | * Custom POV-Ray code input giving access to any POV-Ray feature not supported by the exporter. | ||
| + | |||
| + | POV-Ray 3.7 features | ||
| + | volumetrics and media (scattering/absorbing), blurry reflections(uberpov), ghosting for motion blur(uberpov), micropoly displacement (HGPOV) etc. | ||
| + | }} | ||
| + | |||
<!--<wikinav>---> | <!--<wikinav>---> | ||
<br> | <br> | ||
| − | <table width=100% border=0 cellspacing=0 cellpadding=5> | + | <table width=100% border=0 cellspacing=0 cellpadding=5 style="text-align:center;"> |
| − | <tr><td width= | + | <tr><td width=33% bgcolor=#EEEEEF> |
<font size="+2">[[HowTo:Use_POV-Ray_with_Blender|User's page]]</font size="+2"></td> | <font size="+2">[[HowTo:Use_POV-Ray_with_Blender|User's page]]</font size="+2"></td> | ||
| − | <td width= | + | <td width=33% align=center>[[File:POVExporterLogo.png|center|200px|link=https://povconverter.wordpress.com]]</td> |
| + | <td width=33% bgcolor=#EEEEEF align=center> | ||
<font size="+2">[[HowTo:Use_POV-Ray_with_Blender/Developers_page|Developer's page]]</font size="+2"></td></tr> | <font size="+2">[[HowTo:Use_POV-Ray_with_Blender/Developers_page|Developer's page]]</font size="+2"></td></tr> | ||
</table> | </table> | ||
<!--</wikinav>---> | <!--</wikinav>---> | ||
| − | <div style="column-count: | + | <div style="column-count:3;-moz-column-count:3;-webkit-column-count:3" align=center> |
*[http://povray.org POV-Ray Site] | *[http://povray.org POV-Ray Site] | ||
*[[HowTo:Use_POV-Ray_with_Blender#Quick_Start|Exporter Quick Start]] | *[[HowTo:Use_POV-Ray_with_Blender#Quick_Start|Exporter Quick Start]] | ||
| Line 16: | Line 37: | ||
*[[HowTo:Use_POV-Ray_with_Blender/Sample_Materials| Sample Materials]] | *[[HowTo:Use_POV-Ray_with_Blender/Sample_Materials| Sample Materials]] | ||
*[[Media:POV_WORKSPACE_1.blend|POV-Ray centric default workspace]] | *[[Media:POV_WORKSPACE_1.blend|POV-Ray centric default workspace]] | ||
| − | + | *--- | |
| + | *--- | ||
| + | *--- | ||
| + | *--- | ||
| + | *--- | ||
| + | *--- | ||
| + | *--- | ||
| + | *--- | ||
*design ideas | *design ideas | ||
*[[Media:regression_and_test_blendfiles.zip|regression files]] | *[[Media:regression_and_test_blendfiles.zip|regression files]] | ||
| Line 31: | Line 59: | ||
| − | |||
| − | |||
| − | |||
| − | |||
| − | |||
| − | |||
| − | |||
| − | |||
| − | |||
| − | |||
| − | |||
| − | |||
| − | |||
| − | |||
| − | |||
| − | |||
| − | |||
| − | |||
| − | |||
| − | |||
[[HowTo:Use_POV-Ray_with_Blender#Standard_Script_Information|Standard Script Information]] at the bottom of this page. | [[HowTo:Use_POV-Ray_with_Blender#Standard_Script_Information|Standard Script Information]] at the bottom of this page. | ||
| − | = POV-Ray 3.7 Exporter for Blender 2.8x = | + | = POV-Ray 3.7 Exporter for Blender 2.8x/4.1x = |
POV-Ray is an an SDL based (Scene Description Language) rendering engine with a long history that makes it very stable and feature rich. The latest version of POV-Ray 3.7 can be found at: http://www.povray.org/download/<br/> | POV-Ray is an an SDL based (Scene Description Language) rendering engine with a long history that makes it very stable and feature rich. The latest version of POV-Ray 3.7 can be found at: http://www.povray.org/download/<br/> | ||
| − | Though this exporter is currently shipped with any official Blender builds, the POV-Ray 3.7 renderer itself is not included in Blender like some other renderers are (Cycles or Freestyle for instance). Instead, users are just expected to download and install it for themselves: See the [[HowTo:Install_POV|Installation]] page for platform specific details on how to get, install or build POV-Ray. | + | Though this exporter is currently shipped with any official Blender builds, the POV-Ray 3.7 renderer itself is not included in Blender like some other renderers are (Cycles or Freestyle for instance). Instead, users are just expected to download and install it for themselves: See the [[HowTo:Install_POV|Installation]] page for platform specific details on how to get, install or build POV-Ray. |
=Download= | =Download= | ||
| Line 76: | Line 84: | ||
{| width=100% | {| width=100% | ||
| − | | valign=top | '''1.''' Go to the menu {{Menu| | + | | valign=top | '''1.''' Go to the menu {{Menu|Edit}} |
| − | | [[File:Pov_start01.png|thumb| | + | |
| + | {{Submenu|<u>P</u>references...}} | ||
| + | Choose the {{Menu|Add-Ons}} tab and check {{Button|Persistence of Vision}} down the list of render Add-Ons. | ||
| + | | [[File:Pov_start01.png|thumb|500px|1]] | ||
|- | |- | ||
| − | | valign=top | '''2.''' Choose | + | | valign=top | '''2.''' Choose {{Menu|<u>P</u>ersistence of Vision}} from renderer choices. |
| − | | [[File:Pov_start02.png|thumb| | + | | [[File:Pov_start02.png|thumb|500px|2]] |
|- | |- | ||
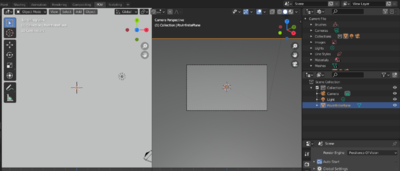
| − | | valign=top | '''3.''' | + | | valign=top | '''3.''' Then you can render as usual with the {{Submenu|<u>R</u>ender Image}} render menu or its shortcut ({{Shortcut/Keypress|F12}} in default keymap) |
| − | | [[File:Pov_start03.png|thumb| | + | | [[File:Pov_start03.png|thumb|500px|3]] |
|} | |} | ||
| Line 89: | Line 100: | ||
| valign=top | The image will be rendered according to parameters set in the ''Properties Window''. | | valign=top | The image will be rendered according to parameters set in the ''Properties Window''. | ||
| − | Main global render settings for instance can be changed in the {{Menu|Render}} tab. | + | Main global render settings for instance can be changed in the {{Menu|Render}} tab of properties window. |
| − | But there are also properties for environment, material (textures), object, etc. all accessible in | + | But there are also properties for environment, material (textures), object, etc. all accessible in neighboring tabs contextually depending on selected object (geometry, camera, light...) |
| − | | [[File:Pov_render_tab_01.png|thumb| | + | | [[File:Pov_render_tab_01.png|thumb|500px|4]] |
|} | |} | ||
| − | =POV | + | =POV compatible forks= |
| − | Below is a comparison of some features of the two engines available to this exporter: | + | Below is a comparison of some features of the two engines available to this exporter to help picking a branch: |
| + | {|class="mw-collapsible mw-collapsed" style="border-spacing:0;" data-expandtext="{{int:show}}" data-collapsetext="{{int:hide}}" | ||
| − | + | ||
| + | |- | ||
| Line 384: | Line 397: | ||
|} | |} | ||
| − | {{MoreDetails| | + | {{MoreDetails|Activating UberPOV| |
| + | |||
[[File:UberPOV.png|left|64px]] | [[File:UberPOV.png|left|64px]] | ||
| − | |||
| − | |||
[http://github.com/UberPOV/UberPOV UberPOV] is a development branch of POV-Ray. Just like MegaPOV used to be in the old days. | [http://github.com/UberPOV/UberPOV UberPOV] is a development branch of POV-Ray. Just like MegaPOV used to be in the old days. | ||
| Line 394: | Line 406: | ||
| − | Choose the feature set and just point the renderer path in {{Menu| | + | Choose the feature set and just point the renderer path in {{Menu|Edit}}{{Submenu|<u>P</u>references}} to the location of the engine you choose to use and you're good to go. |
[[File:RendererPath.png|thumb|600px]] | [[File:RendererPath.png|thumb|600px]] | ||
| − | Note that ''Feature Set'' is what features get written in the POV file and the ''Binary Location'' path points Blender at the binary to actually render it with. Whithout any ''Binary Location'' path, Blender will use the environment variables and try to find the most feature rich binary available in that directory. So if you installed UberPOV it's most probably being used for rendering, but you still need to enable its feature set to enjoy specific features, like blurry reflections. And if you want to be sure to use the plain official POV-Ray 3.7 engine instead, just explicitly point the ''Binary Location'' path to it. | + | Note that ''Feature Set'' is what features get written in the POV file and the ''Binary Location'' path points Blender at the binary to actually render it with. Whithout any ''Binary Location'' path, Blender will use the environment variables and try to find the most feature rich binary available in that directory. So if you installed UberPOV it's most probably being used for rendering, but you still need to enable its feature set to enjoy specific features, like blurry reflections. And if you want to be sure to use the plain official POV-Ray 3.7 engine instead, just explicitly point the ''Binary Location'' path to it. |
}} | }} | ||
| Line 467: | Line 479: | ||
*Option to add comments to POV-Ray file. | *Option to add comments to POV-Ray file. | ||
*Option to write long lists of coordinates in one line for easier browsing of the POV file (and slightly faster parsing by the renderer) | *Option to write long lists of coordinates in one line for easier browsing of the POV file (and slightly faster parsing by the renderer) | ||
| − | *Choice of [[Reference:Global_Settings#Charset|character encoding]] | + | *Choice of [[Reference:Global_Settings#Charset|character encoding]] is automatic for versions above 3.8 |
== Scene Properties == | == Scene Properties == | ||
| Line 474: | Line 486: | ||
== World Properties == | == World Properties == | ||
{| style="width:100%" border="0" | {| style="width:100%" border="0" | ||
| − | |[[File:TerranPOV.png|480px|]] | + | |[[File:TerranPOV.png|left|480px|]] |
===[http://wiki.povray.org/content/Reference:Background Background]=== | ===[http://wiki.povray.org/content/Reference:Background Background]=== | ||
Blender '''World''' gets exported | Blender '''World''' gets exported | ||
*As POV-Ray ''[[Reference:Background|background{}]]'' if flat colored | *As POV-Ray ''[[Reference:Background|background{}]]'' if flat colored | ||
| − | * | + | *As a POV-Ray ''[[Reference:Sky_Sphere|sky_sphere{}]]'' when using Blender's '''Blend Sky''' option |
| + | (sky texture currently appears a little different because of its mapping). | ||
| + | |} | ||
| + | |||
{| style="width:100%" border="0" | {| style="width:100%" border="0" | ||
|[[File:POV_ClearBlueSky.png|left|480px|]] | |[[File:POV_ClearBlueSky.png|left|480px|]] | ||
Using a World Preset such as '''Clear Blue Sky''' can also setup scattering media to a natural looking atmosphere. | Using a World Preset such as '''Clear Blue Sky''' can also setup scattering media to a natural looking atmosphere. | ||
|} | |} | ||
| − | + | ||
| Line 506: | Line 521: | ||
===[http://wiki.povray.org/content/Reference:Camera Camera]=== | ===[http://wiki.povray.org/content/Reference:Camera Camera]=== | ||
| + | {| style="width:100%" border="0" | ||
| + | |[[File:postJhu.jpg|left|480px|]] | ||
====[http://wiki.povray.org/content/Reference:Camera#Focal_Blur Depth of Field]==== | ====[http://wiki.povray.org/content/Reference:Camera#Focal_Blur Depth of Field]==== | ||
It has to be enabled for below property to act: | It has to be enabled for below property to act: | ||
| Line 511: | Line 528: | ||
The focal point of depth of field is based on Blender UI ''Distance'' field, or object field. | The focal point of depth of field is based on Blender UI ''Distance'' field, or object field. | ||
| − | |||
| − | |||
=====Aperture===== | =====Aperture===== | ||
sets the blur amount. (increase to get more) | sets the blur amount. (increase to get more) | ||
| Line 532: | Line 547: | ||
<br/> | <br/> | ||
| − | === | + | ===Light=== |
*No Shadows toggle button can be used to deactivate tracing of shadows for specific lamps only | *No Shadows toggle button can be used to deactivate tracing of shadows for specific lamps only | ||
| Line 717: | Line 732: | ||
<br/> | <br/> | ||
{|width="100%" | {|width="100%" | ||
| − | |left|<youtube>PD4PmGLMyys</youtube> | + | |left|<youtube>https://www.youtube.com/watch?v=PD4PmGLMyys</youtube> |
|} | |} | ||
| Line 745: | Line 760: | ||
{| width=100% | {| width=100% | ||
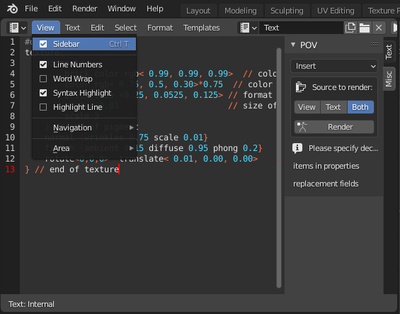
| − | | valign=top | '''1.''' Navigate the text window menu to display the text properties {{Menu|View| | + | | valign=top | '''1.''' Navigate the text window menu to display the text properties {{Menu|View}}{{Submenu|Sidebar}} or use the {{Shortcut/Keypress|⌘ Ctrl}}{{Shortcut/Keypress|T}} shortcut |
| [[File:Pov_ReplaceWith01.png|thumb|400px|1]] | | [[File:Pov_ReplaceWith01.png|thumb|400px|1]] | ||
|- | |- | ||
| valign=top | '''2.''' In the text view properties option, you can chose to render 3d view and/or text. Enable ''Both''. | | valign=top | '''2.''' In the text view properties option, you can chose to render 3d view and/or text. Enable ''Both''. | ||
| − | |||
|- | |- | ||
| valign=top | '''3.''' Syntax highlight detects the following file extensions: | | valign=top | '''3.''' Syntax highlight detects the following file extensions: | ||
| Line 761: | Line 775: | ||
| [[File:povSyntaxHighlight.png|thumb|400px|3]] | | [[File:povSyntaxHighlight.png|thumb|400px|3]] | ||
|- | |- | ||
| − | | valign=top | '''4.''' Some complete POV-Ray scenes are available to Templates menu from the text header. | + | | valign=top | '''4.''' Some complete POV-Ray scenes are available to {{Menu|Templates}} menu from the text header. |
| [[File:povTemplatesMenu.png|thumb|400px|4]] | | [[File:povTemplatesMenu.png|thumb|400px|4]] | ||
|- | |- | ||
| − | | valign=top | '''5.''' And an Insert Menu to add just some pov code snippets at cursor's location. | + | | valign=top | '''5.''' And an {{Menu|Insert}} Menu to add just some pov code snippets at cursor's location. |
| [[File:povInsertMenu.png|thumb|400px|5]] | | [[File:povInsertMenu.png|thumb|400px|5]] | ||
|- | |- | ||
| Line 817: | Line 831: | ||
The rendered plane is actually infinite, but represented by a proxy in the 3D view, which is just very big, but still finite. Please report if you'd rather have a différent default scale. | The rendered plane is actually infinite, but represented by a proxy in the 3D view, which is just very big, but still finite. Please report if you'd rather have a différent default scale. | ||
{| style="width:100%" border="0" | {| style="width:100%" border="0" | ||
| − | |[[File:PovInfinitePlane1.png|400px|]]|[[File:PovInfinitePlane2.png| | + | |[[File:PovInfinitePlane1.png|400px|]]|[[File:PovInfinitePlane2.png|320px|]] |
|} | |} | ||
<br/> | <br/> | ||
| Line 870: | Line 884: | ||
This object behaves like the Blender screw modifier to create surfaces by revolving a spline except instead of being tesselated beforehand, it follows the mathematical curvature of the spline so you won't see any polygons no matter how close you zoom. | This object behaves like the Blender screw modifier to create surfaces by revolving a spline except instead of being tesselated beforehand, it follows the mathematical curvature of the spline so you won't see any polygons no matter how close you zoom. | ||
{| style="width:100%" border="0" | {| style="width:100%" border="0" | ||
| − | |[[File:PovLathe1.png|400px|]]|[[File:PovLathe2.png|400px|]] | + | |[[File:PovLathe1.png|left|400px|]]|[[File:PovLathe2.png|400px|]] |
|} | |} | ||
<br/> | <br/> | ||
| Line 878: | Line 892: | ||
This is a POV-Ray primitive that simply extrudes a shape | This is a POV-Ray primitive that simply extrudes a shape | ||
{| style="width:100%" border="0" | {| style="width:100%" border="0" | ||
| − | |[[File:PovPrism.png|400px|]] | + | |[[File:PovPrism.png|left|400px|]] |
|} | |} | ||
<br/> | <br/> | ||
| Line 885: | Line 899: | ||
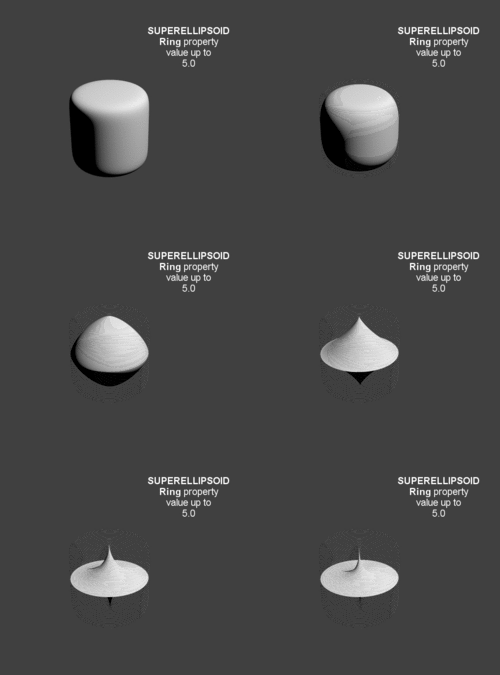
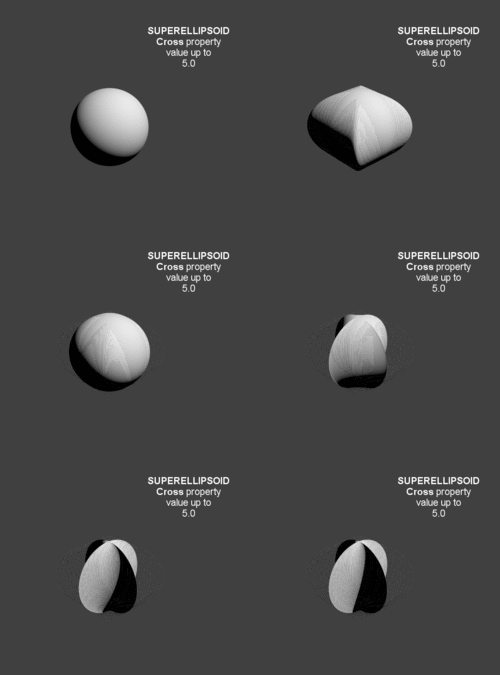
==[http://wiki.povray.org/content/Reference:Superquadric_Ellipsoid Superquadric Ellipsoid]== | ==[http://wiki.povray.org/content/Reference:Superquadric_Ellipsoid Superquadric Ellipsoid]== | ||
A quite versatile tool that can provide quick models for cushion or star shaped objects | A quite versatile tool that can provide quick models for cushion or star shaped objects | ||
| − | + | ||
| − | + | [[File:PovSuperquadricEllipsoid.gif|250px|]][[File:PovSuperquadricEllipsoid2.gif|250px|]] | |
| − | + | ||
| − | + | ||
| − | |||
| − | |||
==[http://wiki.povray.org/content/Reference:Height_Field HeightField]== | ==[http://wiki.povray.org/content/Reference:Height_Field HeightField]== | ||
This is a displacement of a surface following a texture. Tessellation also happens at render time, so you don't need to subdivide anything before. | This is a displacement of a surface following a texture. Tessellation also happens at render time, so you don't need to subdivide anything before. | ||
| − | {| style="width:100%" border="0" | + | {|style="width:100%" border="0" |
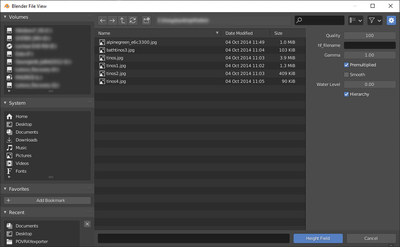
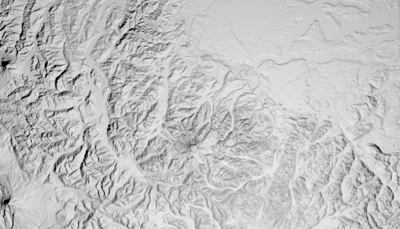
| − | + | [[File:PovHeightField1.png|400px|]]|[[File:PovHeightField2.png|400px|]] | |
|} | |} | ||
| − | |||
[[HowTo:High_precision_heightfields|Read More]] | [[HowTo:High_precision_heightfields|Read More]] | ||
| Line 926: | Line 937: | ||
An isosurfacecomponent shaped as a sphere | An isosurfacecomponent shaped as a sphere | ||
===Supertorus=== | ===Supertorus=== | ||
| − | An isosurface shaped as a torus with deforming parameters equivalent to those of | + | An isosurface shaped as a torus with deforming parameters equivalent to those of t. |
Parameters (POV-Ray names): | Parameters (POV-Ray names): | ||
| + | |||
*''MajorRadius'', ''MinorRadius'' = Base radii for the torus. | *''MajorRadius'', ''MinorRadius'' = Base radii for the torus. | ||
| Line 946: | Line 958: | ||
{| style="width:100%" border="0" | {| style="width:100%" border="0" | ||
|[[File:PovLoft1.png|400px|]]|[[File:PovLoft2.png|400px|]] | |[[File:PovLoft1.png|400px|]]|[[File:PovLoft2.png|400px|]] | ||
| + | |} | ||
| + | |||
| + | ==Parametric surfaces== | ||
| + | The primitive requiring user to activate Add Mesh: Extra Objects addon is Parametric surfaces: that other addon was indeed very well suited to create the 3D view mesh preview, so there was no need to reinvent the wheel. However it is considered bad practice for an addon to enforce activation of another addon so that decision has to be left to the user of activating that other dependency, even though it's still internally shipped with Blender and nothing else has to be done but mere checking of a box at first run (next sessions will remember it). The only consequence is that If you were to enable all addons, Blender would take slightly longer to startup. | ||
| + | |||
| + | *Parametric | ||
| + | {| style="width:100%" border="0" | ||
| + | |[[File:PovParametric1.png|400px|]]|[[File:PovParametric2.png|400px|]] | ||
|} | |} | ||
<br/> | <br/> | ||
| Line 955: | Line 975: | ||
| [[File:POV_importMenu_01.png|thumb|600px|1]] | | [[File:POV_importMenu_01.png|thumb|600px|1]] | ||
|- | |- | ||
| − | | valign=top | '''2.''' Or otherwise, clicking {{Menu|File|Import}} from the main header menu | + | | valign=top | '''2.''' Or otherwise, clicking {{Menu|File}}{{Submenu|Import}} from the main header menu |
| [[File:POV_importMenu_02.png|thumb|600px|2]] | | [[File:POV_importMenu_02.png|thumb|600px|2]] | ||
|- | |- | ||
| Line 1,052: | Line 1,072: | ||
|tooltip= Renders scenes with POV-Ray 3.7 | |tooltip= Renders scenes with POV-Ray 3.7 | ||
|menu= Renderer rolldown menu | |menu= Renderer rolldown menu | ||
| − | |usage= If POV-Ray 3.7 is installed, activate the addon in the menu {{Menu| | + | |usage= If POV-Ray 3.7 is installed, activate the addon in the menu {{Menu|Edit}}{{Submenu|<u>P</u>references}}. Choose it as the renderer and render with {{Shortcut/Keypress|F12}}. |
|version= 0.0.9 | |version= 0.0.9 | ||
|author= Campbell Barton, Silvio Falcinelli, Maurice Raybaud, Constantin Rahn, Bastien Montagne, Leonid Desyatkov | |author= Campbell Barton, Silvio Falcinelli, Maurice Raybaud, Constantin Rahn, Bastien Montagne, Leonid Desyatkov | ||
Latest revision as of 15:05, 22 November 2024
Features
Some key features of the exporter include:
- Geometry import and export with their modifiers, keyed and physics animation
- Add POV-Ray specific non mesh primitives (never show tesselation)
- Instances
- Hair particles
- Smoke simulations
- Atmospheric media (volume fog)
- HDRI environment mapping
- Aperture depth of field
- Material properties such as filtering, emission, translucency, subsurface scattering, glass fog (tinted absorption), blurry/glossy reflections...
- Procedural textures (emulated from Blender Internal and POV-Ray native)
- Image textures
- Texture influence channels: Alpha ; Diffuse ; Bump ; Specular ; Mirror (uses same channel as specular)
- Global Illumination: Radiosity (Indirect Lighting) ; Photons caustics (reflect/refract); meshlights
- Custom POV-Ray code input giving access to any POV-Ray feature not supported by the exporter.
POV-Ray 3.7 features volumetrics and media (scattering/absorbing), blurry reflections(uberpov), ghosting for motion blur(uberpov), micropoly displacement (HGPOV) etc.
| User's page | Developer's page |
- POV-Ray Site
- Exporter Quick Start
- POV-Ray Documentation
- Sample Materials
- POV-Ray centric default workspace
- ---
- ---
- ---
- ---
- ---
- ---
- ---
- ---
- design ideas
- regression files
Standard Script Information at the bottom of this page.
POV-Ray 3.7 Exporter for Blender 2.8x/4.1x
POV-Ray is an an SDL based (Scene Description Language) rendering engine with a long history that makes it very stable and feature rich. The latest version of POV-Ray 3.7 can be found at: http://www.povray.org/download/
Though this exporter is currently shipped with any official Blender builds, the POV-Ray 3.7 renderer itself is not included in Blender like some other renderers are (Cycles or Freestyle for instance). Instead, users are just expected to download and install it for themselves: See the Installation page for platform specific details on how to get, install or build POV-Ray.
Download
- Of course, don't forget to download and install POV-Ray itself !
The POV-Ray exporter is shipped with every official Blender release, so you can start using it directly.
However, after checking the logs of every commit to the source of the script for new features or bug fixes, if you find out you need an update,
- You can download all the script at once by clicking snapshot
- or download a fresh blender build including scripts from generally a few days before
here.
Usage
Quick Start
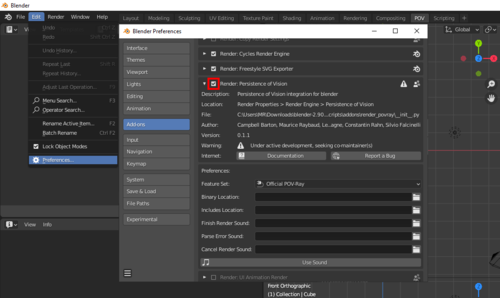
| 1. Go to the menu
Choose the tab and check Persistence of Vision down the list of render Add-Ons. |
|
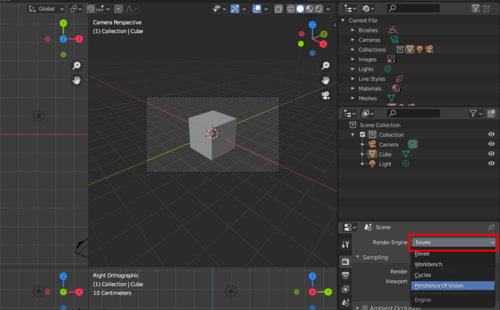
| 2. Choose from renderer choices. | |
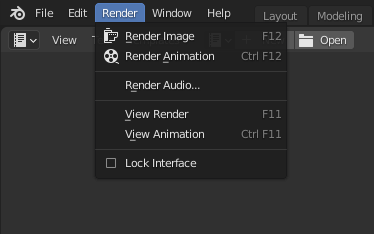
| 3. Then you can render as usual with the render menu or its shortcut (F12 in default keymap) |
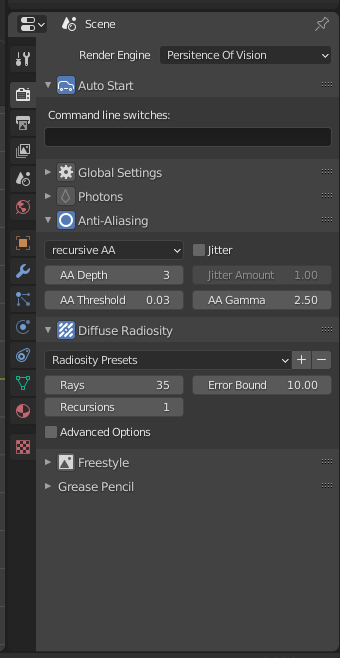
| The image will be rendered according to parameters set in the Properties Window.
Main global render settings for instance can be changed in the tab of properties window. But there are also properties for environment, material (textures), object, etc. all accessible in neighboring tabs contextually depending on selected object (geometry, camera, light...) |
POV compatible forks
Below is a comparison of some features of the two engines available to this exporter to help picking a branch:
| ===== Feature/Engine/Support =====
|
===== POV-Ray =====
|
===== UberPOV =====
|
|---|---|---|
| Full Spectral Resolution | ||
| Supersampling | ||
| Alpha Mapping | ||
| Bump Mapping | ||
| Normal Mapping | ||
| Displacement Mapping | ||
| Motion Blur | ||
| Sub Surface Scattering (SSS) | ||
| Volumetric Scattering (Medium) | ||
| Blurred Reflections | ||
| Clay Render | ||
| Depth of Field | ||
| Material Layering | ||
| Thin Film Coating | ||
| Dispersion | ||
| Anisotropy | ||
| Thin Film Interference | ||
| Complex IOR Files | ||
| Coating Thickness Absorption | ||
| Custom Reflectance 90 | ||
| Custom Fresnel Curve | ||
| Sigma Texture | ||
| Sun-Pool Caustics | ||
| Ambient Occlusion | ||
| Lens Shift | ||
| Diaphragm Circular/Polygonal | ||
| Per-Model Texture Coordinates | ||
| Texture Projection Modes | ||
| Front/Camera Mapping | ||
| Multiple UV Channels | ||
| Texture Tone Mapping | ||
| Procedural Textures | ||
| Texture Layering | ||
| Synthesis Texture Layering | ||
| Point Lighting | ||
| Mesh Lighting | ||
| Image-based Lighting | ||
| Physical Sun/Sky | ||
| HDRI Support | ||
| IES Support | ||
| Instance Support | ||
| Resume/Merge Render | ||
| Interactive Render | ||
| Vignetting / Bloom / Glare (Post) | ||
| Camera Response CRF (Post) | ||
| Color Balance (Post) | ||
| Multithreading | ||
| Region Rendering | ||
| Passive Emitter | ||
| Invisible Emitter | ||
| Invisible Model | ||
| Shadowless Model | ||
| Shadowless Point Lights | ||
| Bucket Rendering |
Activating UberPOV
UberPOV is a development branch of POV-Ray. Just like MegaPOV used to be in the old days.
HERE you can download a standalone installer that will not interfere with a standard POV-Ray installation and HERE is an update to the main binary.
Choose the feature set and just point the renderer path in to the location of the engine you choose to use and you're good to go.
Note that Feature Set is what features get written in the POV file and the Binary Location path points Blender at the binary to actually render it with. Whithout any Binary Location path, Blender will use the environment variables and try to find the most feature rich binary available in that directory. So if you installed UberPOV it's most probably being used for rendering, but you still need to enable its feature set to enjoy specific features, like blurry reflections. And if you want to be sure to use the plain official POV-Ray 3.7 engine instead, just explicitly point the Binary Location path to it.
Exported UI Properties
Render Properties
Radiosity
In POV-Ray, Radiosity is diffuse inter-reflection which has nothing to do with vertex color based radiosity. In fact, it is more similar to final gathering of irradiance samples and provides a noise free indirect light.
Some presets to radiosity are included, their names and settings are those of the rad_def include file shipped with POV-Ray, they set up the properties so you don't need to include the rad_def.inc in the exported pov, it's one of the many examples of what an interface like blender can bring to all POV-Ray users who are not used to have one.
Anti-aliasing
Three sampling methods are supported:
- non-recursive
- recursive
- stochastic (Monte-Carlo)
The third is only available for UberPOV
Sampling depth
Values must be comprised between 1 and 9. Higher values increase render time and may even introduce some undesired blur.
Anti-alias threshold
In the simple, non-recursive method, POV-Ray initially traces one ray per pixel. If the color of a pixel differs from its neighbours (to the left or above) by at least the set threshold value, then the pixel is super-sampled by shooting a given, fixed number of additional rays. The default threshold is 0.3 but it may be changed using this Antialias_Threshold=n.n option.
| Depth of Field Without Anti-Aliasing | |
| Using no anti aliasing when camera Depth of field is on will speed up rendering and often provide decent enough images. |
Bounding method
Also called acceleration, it is set to automatic BSP (Binary space partitioning) by the exporter as it's generally the most efficient(POV-Ray 3.7 only) but other acceleration methods are available in POV-Ray.
Command line switches
Some command line arguments can be passed to POV-Ray. Arguments are separated by spaces. Command line switches consist of a / (Slash), + (plus) or - (minus) sign, followed by one or more alphabetic characters and possibly a numeric value.
| -D | Hide image while rendering Use the command line switch -D to not show the rendered image in POV-Ray (slightly faster and lighter on memory). The image will be sent back to Blender after completion (on Linux this is a hidden default switch to avoid OS specific editor problems). |
| +WT | Limit the number of threads used +WT1 limits POV-Ray to using only one single render thread. (Likewise, +WT2 would instruct POV-Ray to use two render threads.) |
| +C | Continue an interrupted render +C for "Continue trace" is able to recover the point at which your last render stopped and continue it from there (even if you switched off your computer) |
| /EXIT | Close POV-Ray after rendering the image There is also an option in POV-Ray for windows interface to do the same: The "On Completion" option to "Exit POV-Ray for Windows" (in the Render Menu).
|
| Fast Preview Renders | |
| When first setting up your scene, and for fast preview rendering, turn off anti aliasing, depth of field, photons, Radiosity, expensive material features, and in the scene Shading panel, turn off shadows.
(other features might get turned off from this panel in future versions of the exporter) Alternatively, use the [Reference:Tracing_Options#Quality_Settings "quality" command line switches] +q1 to +q11. These allow you to easily disable most of the CPU-intensive features. |
Formatting
The exported POV-Ray file can be customized:
- Different indentation characters to choose from.
- Option to add comments to POV-Ray file.
- Option to write long lists of coordinates in one line for easier browsing of the POV file (and slightly faster parsing by the renderer)
- Choice of character encoding is automatic for versions above 3.8
Scene Properties
Color Management
sRGB is supposed to be always used currently (except for world colors which seem to still be linear in Blender Internal).
World Properties
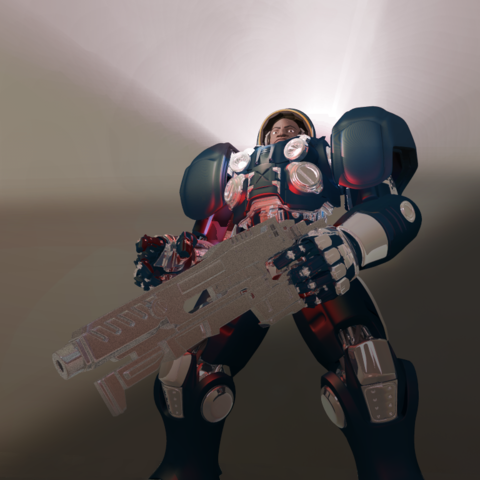
BackgroundBlender World gets exported
(sky texture currently appears a little different because of its mapping). |
|
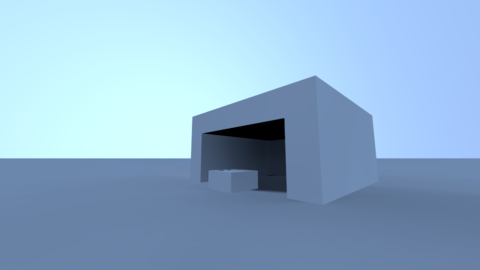
Using a World Preset such as Clear Blue Sky can also setup scattering media to a natural looking atmosphere. |
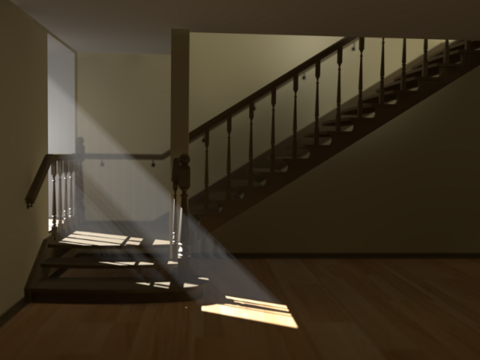
Atmospheric Media(to create volume lights):
|
Object Properties
Importance sampling
It is a priority value between 0 and 1 that can be set per object in the Object properties tab for Radiosity to shoot more rays at object that require them most. Touch this rather carefully when trying to improve render times.
Data Properties
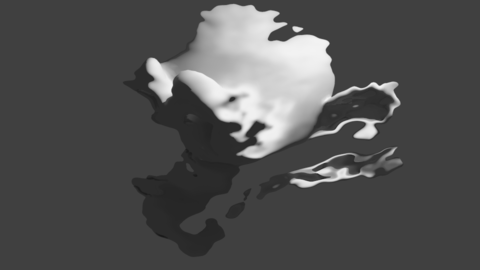
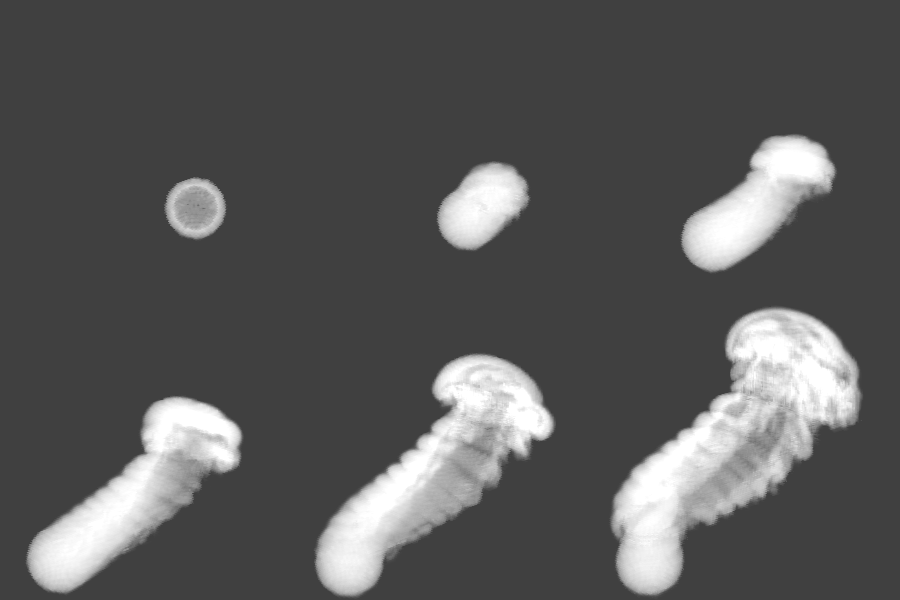
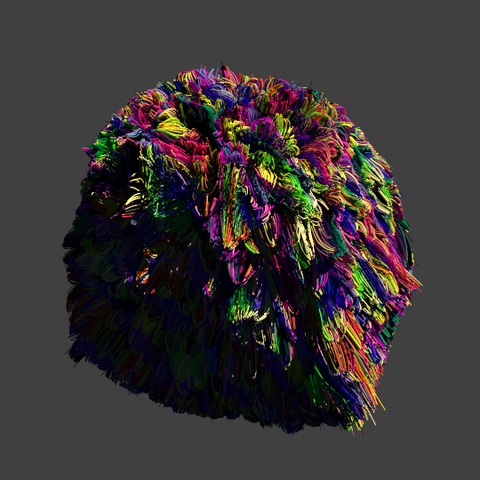
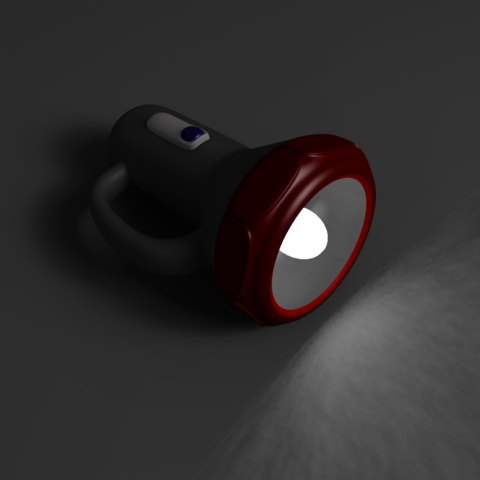
The script exports Sky, Lights, Hair particles, Smoke, fluids, Meshes, Blobs (MetaBalls).
Camera
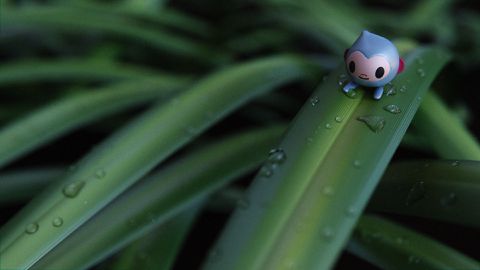
Depth of FieldIt has to be enabled for below property to act: The focal point of depth of field is based on Blender UI Distance field, or object field. Aperturesets the blur amount. (increase to get more) |
PerturbationNormal map for camera plane, native POV procedural patterns can be used with variable
|
Light
- No Shadows toggle button can be used to deactivate tracing of shadows for specific lamps only
| For Realistic Light Attenuation | |
| Use Inverse square falloff, and a small falloff distance value with a higher light intensity will give the best results with Povray's implementation of inverse square law. See this discussion |
Smoke
|
Hair
|
Material Properties
Emission
|
||||||||||||||||||||||||||||||||||||||||||||||||||||||||||||||||||||||||||||||||||||||||||||||||||

