Difference between revisions of "HowTo:Use POV-Ray with Blender"
m |
m (Http fix) |
||
| Line 2: | Line 2: | ||
[[File:POVExporterLogo.png|left|100px]] | [[File:POVExporterLogo.png|left|100px]] | ||
<div class="columnThird" style="text-align:center;"> | <div class="columnThird" style="text-align:center;"> | ||
| − | <ul style="font-size:1.1em; list-style-type:none;"><li><font size="+2">[[Extensions:2.6/Py/Scripts/Render/POV-Ray|User's page]]</font size="21"></li><li>[[ | + | <ul style="font-size:1.1em; list-style-type:none;"><li><font size="+2">[[Extensions:2.6/Py/Scripts/Render/POV-Ray|User's page]]</font size="21"></li><li>[[http://povray.org POV-Ray Site]]</li><li>[[HowTo:Use_POV-Ray_with_Blender#Quick_Start|Exporter Quick Start]]</li><li>[[http://povray.org/documentation/3.7.0/ POV-Ray Documentation]]</li><li>[[Sample_Materials Sample Materials]]</li> |
<li>[[Media:POV_WORKSPACE_1.blend|POV-Ray centric default workspace]]</li></ul> | <li>[[Media:POV_WORKSPACE_1.blend|POV-Ray centric default workspace]]</li></ul> | ||
</div> | </div> | ||
| Line 11: | Line 11: | ||
<div class="clearBoth"></div> | <div class="clearBoth"></div> | ||
<div style="text-align:center; border-top: grey solid 1px;"> | <div style="text-align:center; border-top: grey solid 1px;"> | ||
| − | <ul style="font-size:1.1em; list-style-type:none;"><li><font size="+2">[[ | + | <ul style="font-size:1.1em; list-style-type:none;"><li><font size="+2">[[http://developer.blender.org/diffusion/BA/history/master/render_povray/ Latest News]]</font size="+2"></li> |
<li>[irc$irc.freenode.org/blenderpovray Chat room, IRC: #blenderpovray at freenode]</li> | <li>[irc$irc.freenode.org/blenderpovray Chat room, IRC: #blenderpovray at freenode]</li> | ||
| − | <li>[[ | + | <li>[[http://git.blender.org/gitweb/gitweb.cgi/blender-addons.git/atom/refs/heads/master?f=render_povray RSS feed]]</li> |
| − | <li>[[ | + | <li>[[http://blenderartists.org/forum/group.php?groupid=79 Forum Group]]</li></ul> |
</div> | </div> | ||
</div> | </div> | ||
| Line 37: | Line 37: | ||
volumetrics and media (scattering/absorbing), blurry reflections(uberpov), ghosting for motion blur(uberpov), micropoly displacement (HGPOV) etc. | volumetrics and media (scattering/absorbing), blurry reflections(uberpov), ghosting for motion blur(uberpov), micropoly displacement (HGPOV) etc. | ||
}} | }} | ||
| − | [[ | + | [[http://wiki.blender.org/index.php/Extensions:2.6/Py/Scripts/Render/POV-Ray#Standard_Script_Information Standard Script Information]] at the bottom of this page. |
= POV-Ray 3.7 Exporter for Blender 2.8x = | = POV-Ray 3.7 Exporter for Blender 2.8x = | ||
| − | POV-Ray is an an SDL based (Scene Description Language) rendering engine with a long history that makes it very stable and feature rich. The latest version of POV-Ray 3.7 can be found at: | + | POV-Ray is an an SDL based (Scene Description Language) rendering engine with a long history that makes it very stable and feature rich. The latest version of POV-Ray 3.7 can be found at: http://www.povray.org/download/<br /> |
| − | See the [[ | + | See the [[http://wiki.blender.org/index.php/Extensions:2.6/Py/Scripts/Render/POV-Ray/Installation Installation]] page for platform specific details on how to get, install or build POV-Ray. |
=Download= | =Download= | ||
| − | *Of course, don't forget to [[ | + | *Of course, don't forget to [[http://www.povray.org/download/ download and install POV-Ray]] itself ! |
The POV-Ray exporter is shipped with every official Blender release, so you can start using it directly. | The POV-Ray exporter is shipped with every official Blender release, so you can start using it directly. | ||
| − | However, after checking the logs of [[ | + | However, after checking the logs of [[http://developer.blender.org/diffusion/BA/history/master/render_povray/ every commit to the source]] of the script for new features or bug fixes, if you find out you need an update, |
*You can download all the script at once by clicking ''snapshot'' here: | *You can download all the script at once by clicking ''snapshot'' here: | ||
| − | [[ | + | [[http://git.blender.org/gitweb/gitweb.cgi/blender-addons.git/tree/refs/heads/master:/render_povray]] |
*or download a fresh blender build including scripts from generally a few days before here: | *or download a fresh blender build including scripts from generally a few days before here: | ||
| − | [[ | + | [[http://builder.blender.org/download/]] |
= Usage = | = Usage = | ||
| Line 376: | Line 376: | ||
== Activating UberPOV == | == Activating UberPOV == | ||
| − | [[ | + | [[http://github.com/UberPOV/UberPOV UberPOV]] is a development branch of POV-Ray. Just like MegaPOV used to be in the old days. |
| − | [[ | + | [[http://github.com/UberPOV/UberPOV/releases HERE]] you can download a standalone installer that will not interfere with a standard POV-Ray installation and [[http://github.com/UberPOV/UberPOV/releases/tag/v1.37.1.0-beta.10 HERE]] is an update to the main binary. |
| Line 525: | Line 525: | ||
*No Shadows toggle button can be used to deactivate tracing of shadows for specific lamps only | *No Shadows toggle button can be used to deactivate tracing of shadows for specific lamps only | ||
| − | {{NiceTip|For Realistic Light Attenuation|Use Inverse square falloff, and a small falloff distance value with a higher light intensity will give the best results with Povray's implementation of inverse square law. See [[ | + | {{NiceTip|For Realistic Light Attenuation|Use Inverse square falloff, and a small falloff distance value with a higher light intensity will give the best results with Povray's implementation of inverse square law. See [[http://news.povray.org/povray.general/thread/%3Cweb.4d77b443f36cbfe281c811d20%40news.povray.org%3E/ this discussion]] |
}}<br /> | }}<br /> | ||
| Line 617: | Line 617: | ||
{{Template:MoreDetails|Using Image Sequences| | {{Template:MoreDetails|Using Image Sequences| | ||
| − | [[ | + | [[http://koti.mbnet.fi/mmyllyma/image_sequence.html Link to the original Tutorial by Markku Myllymäki]] |
Note to the reader: this functionality works in Blender Internal, Cycles (see the end this document) and now it works with POV-Ray render (little change in POV-Ray exporter). For Blender itself it is old feature. | Note to the reader: this functionality works in Blender Internal, Cycles (see the end this document) and now it works with POV-Ray render (little change in POV-Ray exporter). For Blender itself it is old feature. | ||
| Line 946: | Line 946: | ||
|} | |} | ||
{{Template:MoreDetails|Merging POV scripted Animations| | {{Template:MoreDetails|Merging POV scripted Animations| | ||
| − | [[ | + | [[http://koti.mbnet.fi/mmyllyma/combine_blender_pov.html link to original tutorial]] |
''While Blender is one of the best modelers in existence, it is primarily a polygon modeler. There are some cases when you want to use something like POV-Ray's CSG features, which are very good at pure, mathematical forms. But compositing POV-Ray and Blender output is hard work. However, there is a way to combine animations to one render with Blender's POV-Ray Exporter!'' | ''While Blender is one of the best modelers in existence, it is primarily a polygon modeler. There are some cases when you want to use something like POV-Ray's CSG features, which are very good at pure, mathematical forms. But compositing POV-Ray and Blender output is hard work. However, there is a way to combine animations to one render with Blender's POV-Ray Exporter!'' | ||
| Line 1,028: | Line 1,028: | ||
We wrote the POV-Ray animation code. This is the ''animation_include_file.inc'' which was included in Python code. Note, that CURFRAMENUM is used. It is the animations current frame number in Blender! This way we can know what should happen and when in POV-Ray code. | We wrote the POV-Ray animation code. This is the ''animation_include_file.inc'' which was included in Python code. Note, that CURFRAMENUM is used. It is the animations current frame number in Blender! This way we can know what should happen and when in POV-Ray code. | ||
Here is the resulting animation: | Here is the resulting animation: | ||
| − | [[File:CompoAnimPreview.png|center|480px|Click image to see the video.|link= | + | [[File:CompoAnimPreview.png|center|480px|Click image to see the video.|link=http://wiki.blender.org/uploads/5/52/Povtut2.mp4]] |
}} | }} | ||
| Line 1,048: | Line 1,048: | ||
Here are the logs of every commit to the source: | Here are the logs of every commit to the source: | ||
| − | [[ | + | [[http://developer.blender.org/diffusion/BA/browse/master/render_povray/]] |
*You can download all the script at once by clicking ''snapshot'' here: | *You can download all the script at once by clicking ''snapshot'' here: | ||
| − | [[ | + | [[http://git.blender.org/gitweb/gitweb.cgi/blender-addons.git/tree/refs/heads/master:/render_povray]] |
*or download a fresh blender build including scripts from generally a few days before here: | *or download a fresh blender build including scripts from generally a few days before here: | ||
| − | [[ | + | [[http://builder.blender.org/download/]] |
| − | *And of course, don't forget to [[ | + | *And of course, don't forget to [[http://www.povray.org/download/ download and install POV-Ray]] itself ! |
|modules= Used standard Python modules | |modules= Used standard Python modules | ||
| Line 1,064: | Line 1,064: | ||
<br /> | <br /> | ||
|data= | |data= | ||
| − | |bugtracker= [[ | + | |bugtracker= [[http://projects.blender.org/tracker/index.php?func=detail&aid=23145]] |
|warning= Please report any bug or request! | |warning= Please report any bug or request! | ||
| − | |link= | + | |link=http://povray.org/ |
|releaselog= [[Dev:2.5/Py/Scripts/Render/POV-Ray]] | |releaselog= [[Dev:2.5/Py/Scripts/Render/POV-Ray]] | ||
|issues= Currently Important: | |issues= Currently Important: | ||
}} | }} | ||
Revision as of 11:55, 19 September 2019
- Developer's page
- design ideas
- regression files
- [Latest News]
- [irc$irc.freenode.org/blenderpovray Chat room, IRC: #blenderpovray at freenode]
- [RSS feed]
- [Forum Group]
Features
[Standard Script Information] at the bottom of this page.
POV-Ray 3.7 Exporter for Blender 2.8x
POV-Ray is an an SDL based (Scene Description Language) rendering engine with a long history that makes it very stable and feature rich. The latest version of POV-Ray 3.7 can be found at: http://www.povray.org/download/
See the [Installation] page for platform specific details on how to get, install or build POV-Ray.
Download
- Of course, don't forget to [download and install POV-Ray] itself !
The POV-Ray exporter is shipped with every official Blender release, so you can start using it directly.
However, after checking the logs of [every commit to the source] of the script for new features or bug fixes, if you find out you need an update,
- You can download all the script at once by clicking snapshot here:
[[1]]
- or download a fresh blender build including scripts from generally a few days before here:
[[2]]
Usage
Quick Start
| The image will be rendered according to parameters set in the Properties Window.
Main global render settings for instance can be changed in the tab. But there are also properties for environment, material (textures), object, etc. all accessible in neighbouring tabs contextually depending on selected object (geometry, camera, light...) |
POV-Ray Branches
Below is a comparison of some features of the two engines available to this exporter:
| ===== Feature/Engine/Support =====
|
===== POV-Ray =====
|
===== UberPOV =====
|
|---|---|---|
| Full Spectral Resolution | ||
| Supersampling | ||
| Alpha Mapping | ||
| Bump Mapping | ||
| Normal Mapping | ||
| Displacement Mapping | ||
| Motion Blur | ||
| Sub Surface Scattering (SSS) | ||
| Volumetric Scattering (Medium) | ||
| Blurred Reflections | ||
| Clay Render | ||
| Depth of Field | ||
| Material Layering | ||
| Thin Film Coating | ||
| Dispersion | ||
| Anisotropy | ||
| Thin Film Interference | ||
| Complex IOR Files | ||
| Coating Thickness Absorption | ||
| Custom Reflectance 90 | ||
| Custom Fresnel Curve | ||
| Sigma Texture | ||
| Sun-Pool Caustics | ||
| Ambient Occlusion | ||
| Lens Shift | ||
| Diaphragm Circular/Polygonal | ||
| Per-Model Texture Coordinates | ||
| Texture Projection Modes | ||
| Front/Camera Mapping | ||
| Multiple UV Channels | ||
| Texture Tone Mapping | ||
| Procedural Textures | ||
| Texture Layering | ||
| Synthesis Texture Layering | ||
| Point Lighting | ||
| Mesh Lighting | ||
| Image-based Lighting | ||
| Physical Sun/Sky | ||
| HDRI Support | ||
| IES Support | ||
| Instance Support | ||
| Resume/Merge Render | ||
| Interactive Render | ||
| Vignetting / Bloom / Glare (Post) | ||
| Camera Response CRF (Post) | ||
| Color Balance (Post) | ||
| Multithreading | ||
| Region Rendering | ||
| Passive Emitter | ||
| Invisible Emitter | ||
| Invisible Model | ||
| Shadowless Model | ||
| Shadowless Point Lights | ||
| Bucket Rendering |
How to pick a branch
Exported UI Properties
Render Properties
Radiosity
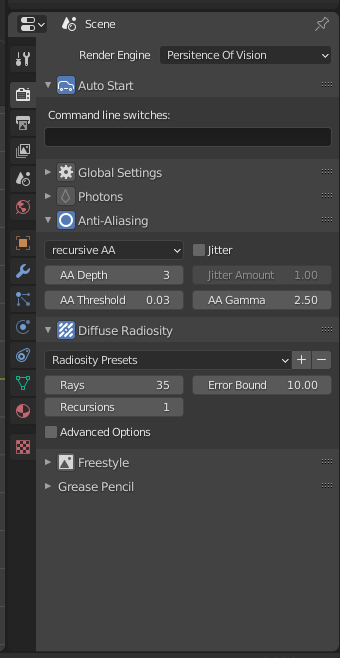
In POV-Ray, Radiosity is diffuse inter-reflection which has nothing to do with vertex color based radiosity. In fact, it is more similar to final gathering of irradiance samples and provides a noise free indirect light.
Some presets to radiosity are included, their names and settings are those of the rad_def include file shipped with POV-Ray, they set up the properties so you don't need to include the rad_def.inc in the exported pov, it's one of the many examples of what an interface like blender can bring to all POV-Ray users who are not used to have one.
Anti-aliasing
Three sampling methods are supported:
- non-recursive
- recursive
- stochastic (Monte-Carlo)
The third is only available for UberPOV
Sampling depth
Values must be comprised between 1 and 9. Higher values increase render time and may even introduce some undesired blur.
Anti-alias threshold
In the simple, non-recursive method, POV-Ray initially traces one ray per pixel. If the color of a pixel differs from its neighbours (to the left or above) by at least the set threshold value, then the pixel is super-sampled by shooting a given, fixed number of additional rays. The default threshold is 0.3 but it may be changed using this Antialias_Threshold=n.n option.
| Depth of Field Without Anti-Aliasing | |
| Using no anti aliasing when camera Depth of field is on will speed up rendering and often provide decent enough images. |
Bounding method
Also called acceleration, it is set to automatic BSP (Binary space partitioning) by the exporter as it's generally the most efficient(POV-Ray 3.7 only) but other acceleration methods are available in POV-Ray.
Command line switches
Some command line arguments can be passed to POV-Ray. Arguments are separated by spaces. Command line switches consist of a / (Slash), + (plus) or - (minus) sign, followed by one or more alphabetic characters and possibly a numeric value.
| -D | Hide image while rendering Use the command line switch -D to not show the rendered image in POV-Ray (slightly faster and lighter on memory). The image will be sent back to Blender after completion (on Linux this is a hidden default switch to avoid OS specific editor problems). |
| +WT | Limit the number of threads used +WT1 limits POV-Ray to using only one single render thread. (Likewise, +WT2 would instruct POV-Ray to use two render threads.) |
| +C | Continue an interrupted render +C for "Continue trace" is able to recover the point at which your last render stopped and continue it from there (even if you switched off your computer) |
| /EXIT | Close POV-Ray after rendering the image There is also an option in POV-Ray for windows interface to do the same: The "On Completion" option to "Exit POV-Ray for Windows" (in the Render Menu).
|
| Fast Preview Renders | |
| When first setting up your scene, and for fast preview rendering, turn off anti aliasing, depth of field, photons, Radiosity, expensive material features, and in the scene Shading panel, turn off shadows. (other features might get turned off from this panel in future versions of the exporter) Alternatively, use the Reference:Tracing_Options#Quality_Settings "quality" command line switches +q1 to +q11. These allow you to easily disable most of the CPU-intensive features. |
Formatting
The exported POV-Ray file can be customized:
- Different indentation characters to choose from.
- Option to add comments to POV-Ray file.
- Option to write long lists of coordinates in one line for easier browsing of the POV file (and slightly faster parsing by the renderer)
Scene Properties
Color Management
sRGB is supposed to be always used currently (except for world colors which seem to still be linear in Blender Internal).
World Properties
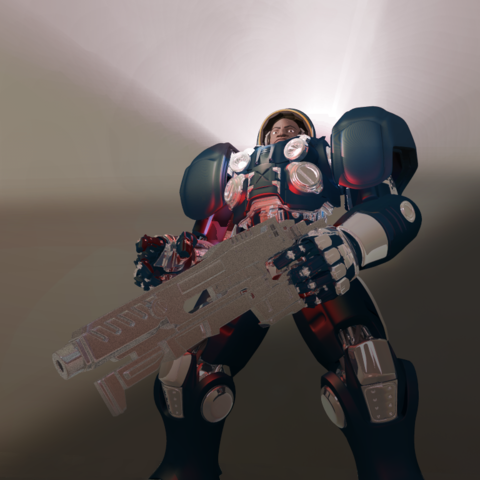
BackgroundBlender World gets exported
(sky texture currently appears a little different because of its mapping).
Object PropertiesImportance samplingIt is a priority value between 0 and 1 that can be set per object in the Object properties tab for Radiosity to shoot more rays at object that require them most. Touch this rather carefully when trying to improve render times. Data PropertiesThe script exports Sky, Lights, Hair particles, Smoke, fluids, Meshes, Blobs (MetaBalls). CameraDepth of FieldIt has to be enabled for below property to act: The focal point of depth of field is based on Blender UI Distance field, or object field.
Lamp
Material Properties
|

