Difference between revisions of "Documentation Talk:Reference Section 3"
Le Forgeron (talk | contribs) m (→panoramic: vectors should also be orthogonal/perpendicular) |
Jholsenback (talk | contribs) m (renamed image to reflect accepted naming convention, and enclosed the image in a table with it's caption) |
||
| Line 63: | Line 63: | ||
===Camera=== | ===Camera=== | ||
====Fisheye==== | ====Fisheye==== | ||
| − | [[ | + | <table class="centered" width="660px" cellpadding="0" cellspacing="10"> |
| + | <tr> | ||
| + | <td> | ||
| + | [[Image:RefImgCameraViewFisheye.png|center|640px<!--center--->]] | ||
| + | </td> | ||
| + | </tr> | ||
| + | <tr> | ||
| + | <td> | ||
| + | <p class="caption">The fisheye projection</p> | ||
| + | </td> | ||
| + | <td> | ||
| + | </td> | ||
| + | </tr> | ||
| + | </table> | ||
Length of direction, up and right are irrelevant. Angle is the important setting and can go up to 360. | Length of direction, up and right are irrelevant. Angle is the important setting and can go up to 360. | ||
| + | |||
====omnimax==== | ====omnimax==== | ||
[[image:CameraViewOmnimax.png]] | [[image:CameraViewOmnimax.png]] | ||
Revision as of 13:47, 30 September 2011
Handedness
The right vector also describes the direction to the right of
the camera. It tells POV-Ray where the right side of your screen is. The sign
of the right vector can be used to determine the handedness of
the coordinate system in use. The default value is:
right<1.33,0,0>. This means that the +x-direction is to the
right. It is called a left-handed system because you can use your
left hand to keep track of the axes. Hold out your left hand with your palm
facing to your right. Stick your thumb up. Point straight ahead with your
index finger. Point your other fingers to the right. Your bent fingers are
pointing to the +x-direction. Your thumb now points into +y-direction. Your
index finger points into the +z-direction.
To use a right-handed coordinate system, as is popular in some CAD programs
and other ray-tracers, make the same shape using your right hand. Your thumb
still points up in the +y-direction and your index finger still points
forward in the +z-direction but your other fingers now say the +x-direction
is to the left. That means that the right side of your screen is now in the
-x-direction. To tell POV-Ray to act like this you can use a negative x value
in the right vector such as:
right<-1.33,0,0>. Since having x values increasing to the left
does not make much sense on a 2D screen you now rotate the whole thing 180
degrees around by using a positive z value in your camera's location. You
end up with something like this.
camera {
  location <0,0,10>
  up    <0,1,0>
  right  <-1.33,0,0>
  look_at <0,0,0>
  }
Now when you do your ray-tracer's aerobics, as explained in the section "Understanding POV-Ray's Coordinate System", you use your right hand to determine the direction of rotations.
In a two dimensional grid, x is always to the right and y is up. The two versions of handedness arise from the question of whether z points into the screen or out of it and which axis in your computer model relates to up in the real world.
Architectural CAD systems, like AutoCAD, tend to use the God's Eye orientation that the z-axis is the elevation and is the model's up direction. This approach makes sense if you are an architect looking at a building blueprint on a computer screen. z means up, and it increases towards you, with x and y still across and up the screen. This is the basic right handed system.
Stand alone rendering systems, like POV-Ray, tend to consider you as a participant. You are looking at the screen as if you were a photographer standing in the scene. The up direction in the model is now y, the same as up in the real world and x is still to the right, so z must be depth, which increases away from you into the screen. This is the basic left handed system.
I suggest editing the quite arbitrary handedness-"gymnastics" in this chapter (why should the thumb be Y, the index finger Z and the other fingers X?) to match those described in "Understanding POV-Ray's Coordinate System" (you don't have to be much of an acrobat either to exercise those).
I've added the text from that section. What changes did you have in mind? --jholsenback 19:14, 21 June 2009 (UTC)
Camera
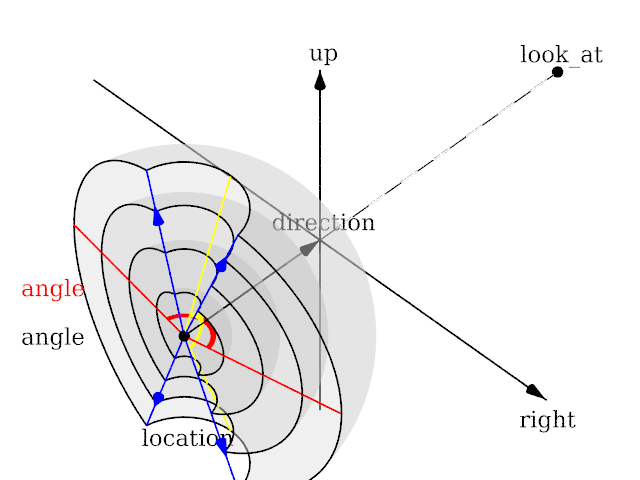
Fisheye
|
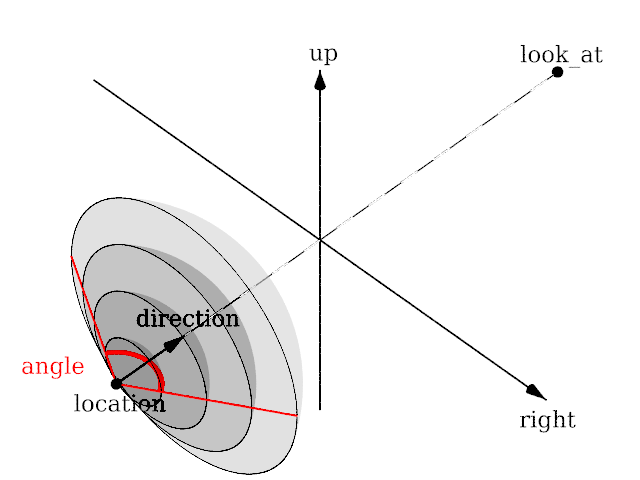
The fisheye projection |
Length of direction, up and right are irrelevant. Angle is the important setting and can go up to 360.
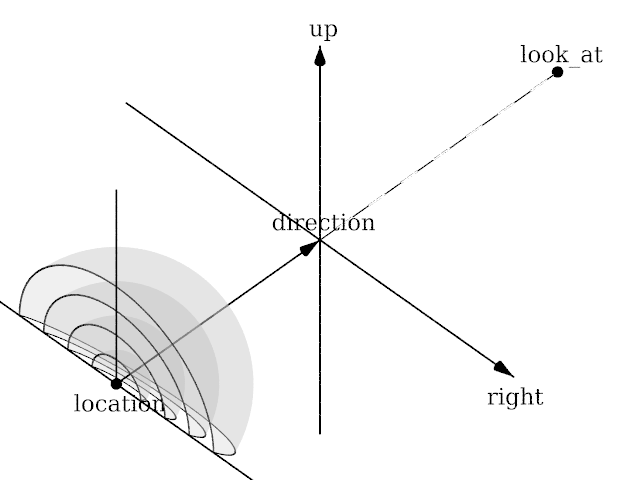
omnimax
Angle is irrelevant. The relative length of up and right are important.
orthographic
File:CameraViewOrthographic.png
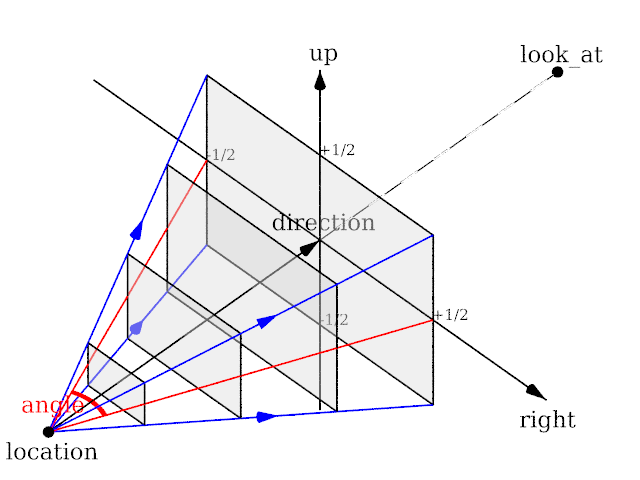
Length of direction is irrelevant unless angle is used. Lengths of up and right define the dimensions of the view. Angle can be used (as long as less than 180) and will override the length of right and up (the aspect ratio between up and right will be kept nevertheless) with a scope of a perspective camera with the same direction and angle.
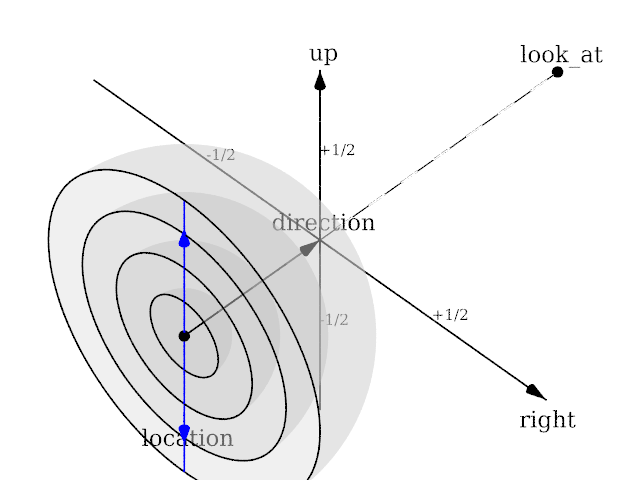
panoramic
Angle is irrelevant. The relative length of direction, up and right are important as they defines the lengths of the 3 axis of the ellipsoid. With identical length and orthogonal vectors (both strongly recommended, unless used on purpose), it's identical to a spherical camera with angle 180,90.
perspective
Angle can be used as long as less than 180 and will recompute the length of right and up using direction, while keeping the aspect ratio between up and right.
spherical
Lengths of direction, up and right vectors are irrelevant. Angle is the important setting, and it gets two values separated by a comma: the first is the horizontal angle, the second is the vertical angle. Both values can reach 360. If the second value is missing, it get half the value of the first.
