Difference between revisions of "HowTo:Encode animations as Ogg Theora Video"
(adding screenshot) |
m |
||
| Line 1: | Line 1: | ||
| − | As illustrated in the other tutorials, POV-Ray only renders the individual frames of an animation. It is up to you to compile these frames into an animation file that you can view and share with others. [http://www.theora.org/ | + | As illustrated in the other tutorials, POV-Ray only renders the individual frames of an animation. It is up to you to compile these frames into an animation file that you can view and share with others. [http://www.theora.org/ Ogg Theora] is a good choice if you need higher image quality than GIF can provide. Theora is a non-proprietary video format so you won't need to worry about licensing and royalties if you go commercial with your work. |
== Animate Your Frames == | == Animate Your Frames == | ||
Revision as of 15:08, 16 March 2008
As illustrated in the other tutorials, POV-Ray only renders the individual frames of an animation. It is up to you to compile these frames into an animation file that you can view and share with others. Ogg Theora is a good choice if you need higher image quality than GIF can provide. Theora is a non-proprietary video format so you won't need to worry about licensing and royalties if you go commercial with your work.
Animate Your Frames
The following instructions assume you have a directory containing the image frames created with POV-Ray. See the bottom of this page if you need help with this step.
Encoding Under Linux
Instructions for encoding on the Linux platform:
Install the tools
You'll need the following command-line tools installed:
- png2yuv (Part of the MJPEG Tools project. Under Ubuntu/Debian simply install the mjpegtools package.)
- ffmpeg2theora (ffmpeg2theora home page. Under Ubuntu/Debian simply install the ffmpeg2theora package.)
Encode!
1) Open a command shell to the directory containing your image frames. (Note: the frames must be in PNG format (POV-Ray default).)
2) Compile the frames to the intermediate YUV4MPEG stream format:
png2yuv -I p -f 25 -j cube%02d.png -b 1 > tmp.yuv
Explanation of command:
- -I p - no interlacing
- -f 25 - Frame-rate (25 fps). 25 fps is good for motion video.
- cube%02d.png - Frame file name pattern. This says our files are named cube00.png through cube99.png. (png2yuv will stop when it finds no more numbers). If you had hundreds of frames you would specify: %03d, thousands: %04d, and so on.
- -b 1 - Start on cube01.png rather than cube00.png (because we don't have cube00.png)
- > tmp.yuv - Redirect the output to a file.
3) Compress into Theora format:
ffmpeg2theora --optimize --videoquality 10 --videobitrate 16778 -o MyAnim.theora tmp.yuv
Explanation of command:
- --optimize --videoquality 10 --videobitrate 16778 - This is my attempt to give the highest video quality. Type ffmpeg2theora --help for a description of the parameters (or man ffmpeg2theora).
- -o MyAnim.theora - The output file name. (I'm not sure if .theora is the standard extension for theora videos. I've seen .ogg used as well but didn't want to confuse it with ogg vorbis audio files.)
- tmp.yuv - the input file (the one we created with png2yuv).
Encoding On other Operating Systems
TODO. This is a wiki so contributors are welcome to fill this in.
View It!
You should now have MyAnim.theora waiting to be viewed. I used the Totem program to view it under Linux. Here's a page listing other players.
Have fun!
(Example)
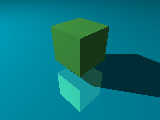
If you need an example pov script to create the animation frames...
- Save the following two files to a temporary folder
- Open a command shell to the folder and type:
- povray cube.ini +W320 +H240
- After rendering you should 50 png image files (cube01.png - cube50.png)
- Use above instructions to encode the frames
cube.pov
global_settings {
   assumed_gamma 1.5
   noise_generator 2
}

box {
   <-0.5, -0.5, -0.5>, <0.5, 0.5, 0.5>

   pigment {
      color rgb <0.3, 1, 0.3>
   }
   scale 1
   rotate<0, 360*(clock+0.00), 0>
   translate y*0.5
}

light_source {
   <4, 5, -5>, rgb <1, 1, 1>
}

camera {
   perspective
   location <2, 2, 2>
   sky <0, 1, 0>
   direction <0, 0, 1>
   right <1.3333, 0, 0>
   up <0, 1, 0>
   look_at <0, 0, 0>
}

plane {
   <0, 1, 0>, 0

   pigment {
      color rgb <0, 0.784314, 1>
   }

   finish {
      reflection {
         rgb <1, 1, 1>
      }
   }
   scale 1
   rotate <0, 0, 0>
   translate y*(-0.25)
}
cube.ini
; POV-Ray animation ini file
Antialias=On
Antialias_Threshold=0.1
Antialias_Depth=2

Input_File_Name=cube.pov

Initial_Frame=1
Final_Frame=50
Initial_Clock=0
Final_Clock=1

Cyclic_Animation=on
Pause_when_Done=off
