Difference between revisions of "Documentation:Tutorial Section 3.5"
Jholsenback (talk | contribs) m (link typo) |
m (Indexentries fix) |
||
| (One intermediate revision by the same user not shown) | |||
| Line 8: | Line 8: | ||
<!--</wikitalk>---> | <!--</wikitalk>---> | ||
<!--REMOVE--->===Advanced Texture Options===<!--THIS---> | <!--REMOVE--->===Advanced Texture Options===<!--THIS---> | ||
| + | ====Limitations Of Special Textures==== | ||
{{#indexentry:Special Textures, limitations of}} | {{#indexentry:Special Textures, limitations of}} | ||
| − | |||
<p>There are a couple limitations to all of the special textures we have seen | <p>There are a couple limitations to all of the special textures we have seen | ||
(from textures, pigment and normal maps through material maps). First, if we | (from textures, pigment and normal maps through material maps). First, if we | ||
| Line 68: | Line 68: | ||
just waiting to be created!</p> | just waiting to be created!</p> | ||
| + | ===Using Atmospheric Effects=== | ||
{{#indexentry:Atmospheric Effects, using}} | {{#indexentry:Atmospheric Effects, using}} | ||
| − | |||
<p>POV-Ray offers a variety of atmospheric effects, i. e. features that | <p>POV-Ray offers a variety of atmospheric effects, i. e. features that | ||
affect the background of the scene or the air by which everything is | affect the background of the scene or the air by which everything is | ||
| Line 87: | Line 87: | ||
Last but not least you can add a rainbow to your scene.</p> | Last but not least you can add a rainbow to your scene.</p> | ||
| + | ====The Background==== | ||
{{#indexentry:Background, tutorial}} | {{#indexentry:Background, tutorial}} | ||
| − | |||
<p>The <code>[[Reference:Background|background]]</code> feature is used to assign a color to all rays | <p>The <code>[[Reference:Background|background]]</code> feature is used to assign a color to all rays | ||
that do not hit any object. This is done in the following way.</p> | that do not hit any object. This is done in the following way.</p> | ||
| Line 106: | Line 106: | ||
translucency remains after all sky sphere pigment layers are processed.</p> | translucency remains after all sky sphere pigment layers are processed.</p> | ||
| − | |||
====The Sky Sphere==== | ====The Sky Sphere==== | ||
| + | {{#indexentry:Sky Sphere, the}} | ||
| + | {{#indexentry:sky_sphere, tutorial}} | ||
<p>The <code>[[Reference:Sky Sphere|sky_sphere]]</code> can be used to easily create a cloud covered | <p>The <code>[[Reference:Sky Sphere|sky_sphere]]</code> can be used to easily create a cloud covered | ||
sky, a nightly star sky or whatever sky you have in mind.</p> | sky, a nightly star sky or whatever sky you have in mind.</p> | ||
| Line 114: | Line 115: | ||
will get more and more complex as we add new features to it.</p> | will get more and more complex as we add new features to it.</p> | ||
| + | =====Creating a Sky with a Color Gradient===== | ||
{{#indexentry:Sky, with a color gradient}} | {{#indexentry:Sky, with a color gradient}} | ||
| − | |||
<p>Beside the single color sky sphere that is covered with the background | <p>Beside the single color sky sphere that is covered with the background | ||
feature the simplest sky sphere is a color gradient. You may have noticed | feature the simplest sky sphere is a color gradient. You may have noticed | ||
| Line 272: | Line 273: | ||
<p>Looking at the resulting image you will see what impressive effects you | <p>Looking at the resulting image you will see what impressive effects you | ||
can achieve with the sky sphere.</p> | can achieve with the sky sphere.</p> | ||
| + | |||
| + | =====Adding Some Clouds===== | ||
{{#indexentry:Clouds, adding}} | {{#indexentry:Clouds, adding}} | ||
| − | |||
<p>To further improve our image we want to add some clouds by adding a second | <p>To further improve our image we want to add some clouds by adding a second | ||
pigment. This new pigment uses the bozo pattern to create some nice clouds. | pigment. This new pigment uses the bozo pattern to create some nice clouds. | ||
| Line 329: | Line 331: | ||
cast shadows you will have to use a real, large sphere with an appropriate | cast shadows you will have to use a real, large sphere with an appropriate | ||
texture and a light source somewhere outside the sphere.</p> | texture and a light source somewhere outside the sphere.</p> | ||
| + | |||
| + | ====The Fog==== | ||
{{#indexentry:Fog, adding}} | {{#indexentry:Fog, adding}} | ||
{{#indexentry:fog, tutorial}} | {{#indexentry:fog, tutorial}} | ||
| − | |||
<p>You can use the <code>[[Reference:Fog|fog]]</code> feature to add fog of two different types | <p>You can use the <code>[[Reference:Fog|fog]]</code> feature to add fog of two different types | ||
to your scene: constant fog and ground fog. The constant fog has a constant | to your scene: constant fog and ground fog. The constant fog has a constant | ||
| Line 340: | Line 343: | ||
detail.</p> | detail.</p> | ||
| + | =====A Constant Fog===== | ||
{{#indexentry:Fog, constant}} | {{#indexentry:Fog, constant}} | ||
| − | |||
<p>The simplest fog type is the constant fog that has a constant density in | <p>The simplest fog type is the constant fog that has a constant density in | ||
all locations. It is specified by a <code>distance</code> keyword which | all locations. It is specified by a <code>distance</code> keyword which | ||
| Line 407: | Line 410: | ||
in the greenish fog we used, as does the checkerboard plane.</p> | in the greenish fog we used, as does the checkerboard plane.</p> | ||
| + | =====Setting a Minimum Translucency===== | ||
{{#indexentry:Fog, setting minimum translucency}} | {{#indexentry:Fog, setting minimum translucency}} | ||
| − | |||
<p>If you want to make sure that the background does not completely vanish in | <p>If you want to make sure that the background does not completely vanish in | ||
the fog you can set the transmittance channel of the fog's color to the | the fog you can set the transmittance channel of the fog's color to the | ||
| Line 437: | Line 440: | ||
</table> | </table> | ||
| + | =====Creating a Filtering Fog===== | ||
{{#indexentry:Fog, filtering}} | {{#indexentry:Fog, filtering}} | ||
| − | |||
<p>The greenish fog we have used so far does not filter the light passing | <p>The greenish fog we have used so far does not filter the light passing | ||
through it. All it does is to diminish the light's intensity. We can | through it. All it does is to diminish the light's intensity. We can | ||
| Line 472: | Line 475: | ||
influenced by the fog. The red and especially the blue sphere got a green | influenced by the fog. The red and especially the blue sphere got a green | ||
hue.</p> | hue.</p> | ||
| + | |||
| + | =====Adding Some Turbulence to the Fog===== | ||
{{#indexentry:Fog, adding turbulence}} | {{#indexentry:Fog, adding turbulence}} | ||
| − | |||
<p>In order to make our somewhat boring fog a little bit more interesting we | <p>In order to make our somewhat boring fog a little bit more interesting we | ||
can add some turbulence, making it look like it had a non-constant density | can add some turbulence, making it look like it had a non-constant density | ||
| Line 513: | Line 517: | ||
turbulence value at a point along the viewing ray.</p> | turbulence value at a point along the viewing ray.</p> | ||
| − | |||
=====Using Ground Fog===== | =====Using Ground Fog===== | ||
| + | {{#indexentry:Ground Fog, using}} | ||
| + | {{#indexentry:Fog, ground}} | ||
<p>The much more interesting and flexible fog type is the ground fog, which | <p>The much more interesting and flexible fog type is the ground fog, which | ||
is selected with the <code>[[Reference:Fog|fog_type]]</code> statement. | is selected with the <code>[[Reference:Fog|fog_type]]</code> statement. | ||
Latest revision as of 14:24, 16 December 2016
|
This document is protected, so submissions, corrections and discussions should be held on this documents talk page. |
Advanced Texture Options
Limitations Of Special Textures
There are a couple limitations to all of the special textures we have seen (from textures, pigment and normal maps through material maps). First, if we have used the default directive to set the default texture for all items in our scene, it will not accept any of the special textures discussed here. This is really quite minor, since we can always declare such a texture and apply it individually to all objects. It does not actually prevent us from doing anything we could not otherwise do.
The other is more limiting, but as we will shortly see, can be worked around quite easily. If we have worked with layered textures, we have already seen how we can pile multiple texture patterns on top of one another (as long as one texture has transparency in it). This very useful technique has a problem incorporating the special textures we have just seen as a layer. But there is an answer!
For example, say we have a layered texture called
Speckled_Metal, which produces a silver metallic surface, and then
puts tiny specks of rust all over it. Then we decide, for a really rusty
look, we want to create patches of concentrated rust, randomly over the
surface. The obvious approach is to create a special texture pattern, with
transparency to use as the top layer. But of course, as we have seen, we
would not be able to use that texture pattern as a layer. We would just
generate an error message. The solution is to turn the problem inside out,
and make our layered texture part of the texture pattern instead, like
this
  // This part declares a pigment for use
  // in the rust patch texture pattern
  #declare Rusty = pigment {
    granite
    color_map {
      [ 0 rgb <0.2, 0, 0> ]
      [ 1 Brown ]
    }
    frequency 20
  }
  // And this part applies it
  // Notice that our original layered texture
  // "Speckled_Metal" is now part of the map
  #declare Rust_Patches = texture {
    bozo
    texture_map {
      [ 0.0  pigment {Rusty} ]
      [ 0.75 Speckled_Metal ]
      [ 1.0  Speckled_Metal ]
    }
  }
And the ultimate effect is the same as if we had layered the rust patches on to the speckled metal anyway.
With the full array of patterns, pigments, normals, finishes, layered and special textures, there is now practically nothing we cannot create in the way of amazing textures. An almost infinite number of new possibilities are just waiting to be created!
Using Atmospheric Effects
POV-Ray offers a variety of atmospheric effects, i. e. features that affect the background of the scene or the air by which everything is surrounded.
It is easy to assign a simple color or a complex color pattern to a virtual sky sphere. You can create anything from a cloud free, blue summer sky to a stormy, heavy clouded sky. Even starfields can easily be created.
You can use different kinds of fog to create foggy scenes. Multiple fog layers of different colors can add an eerie touch to your scene.
A much more realistic effect can be created by using an atmosphere, a constant fog that interacts with the light coming from light sources. Beams of light become visible and objects will cast shadows into the fog.
Last but not least you can add a rainbow to your scene.
The Background
The background feature is used to assign a color to all rays
that do not hit any object. This is done in the following way.
  camera {
    location <0, 0, -10>
    look_at <0, 0, 0>
  }
  background { color rgb <0.2, 0.2, 0.3> }
  sphere {
    0, 1
    pigment { color rgb <0.8, 0.5, 0.2> }
  }
The background color will be visible if a sky sphere is used and if some translucency remains after all sky sphere pigment layers are processed.
The Sky Sphere
The sky_sphere can be used to easily create a cloud covered
sky, a nightly star sky or whatever sky you have in mind.
In the following examples we will start with a very simple sky sphere that will get more and more complex as we add new features to it.
Creating a Sky with a Color Gradient
Beside the single color sky sphere that is covered with the background feature the simplest sky sphere is a color gradient. You may have noticed that the color of the sky varies with the angle to the earth's surface normal. If you look straight up the sky normally has a much deeper blue than it has at the horizon.
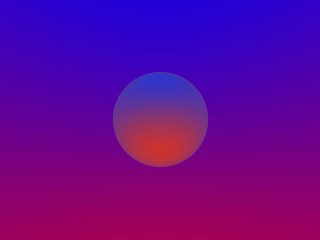
We want to model this effect using the sky sphere as shown in the scene skysph1.pov
below.
  #include "colors.inc"
  camera {
    location <0, 1, -4>
    look_at <0, 2, 0>
    angle 80
  }
  light_source { <10, 10, -10> White }
  sphere {
    2*y, 1
    pigment { color rgb <1, 1, 1> }
    finish { ambient 0.2 diffuse 0 reflection 0.6 }
  }
  sky_sphere {
    pigment {
      gradient y
      color_map {
        [0 color Red]
        [1 color Blue]
      }
      scale 2
      translate -1
    }
  }
The interesting part is the sky sphere statement. It contains a pigment that describes the look of the sky sphere. We want to create a color gradient along the viewing angle measured against the earth's surface normal. Since the ray direction vector is used to calculate the pigment colors we have to use the y-gradient.
The scale and translate transformation are used to map the points derived
from the direction vector to the right range. Without those transformations
the pattern would be repeated twice on the sky sphere. The scale
statement is used to avoid the repetition and the translate -1
statement moves the color at index zero to the bottom of the sky sphere
(that is the point of the sky sphere you will see if you look straight
down).
After this transformation the color entry at position 0 will be at the bottom of the sky sphere, i. e. below us, and the color at position 1 will be at the top, i. e. above us.
The colors for all other positions are interpolated between those two colors as you can see in the resulting image.
|
A simple gradient sky sphere. |
If you want to start one of the colors at a specific angle you will
first have to convert the angle to a color map index. This is done by using
the formula color_map_index = (1 - cos(angle)) / 2 where the
angle is measured against the negated earth's surface normal. This is the
surface normal pointing towards the center of the earth. An angle of 0
degrees describes the point below us while an angle of 180 degrees represents
the zenith.
In POV-Ray you first have to convert the degree value to radians
as it is shown in the following example.
  sky_sphere {
    pigment {
      gradient y
      color_map {
        [(1-cos(radians( 30)))/2 color Red]
        [(1-cos(radians(120)))/2 color Blue]
      }
      scale 2
      translate -1
    }
  }
This scene uses a color gradient that starts with a red color at 30 degrees and blends into the blue color at 120 degrees. Below 30 degrees everything is red while above 120 degrees all is blue.
Adding the Sun
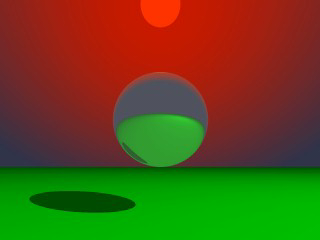
In the following example we will create a sky with a red sun surrounded by a red color halo that blends into the dark blue night sky. We will do this using only the sky sphere feature.
The sky sphere we use is shown below. A ground plane is also added for
greater realism (skysph2.pov).
  sky_sphere {
    pigment {
      gradient y
      color_map {
        [0.000 0.002 color rgb <1.0, 0.2, 0.0>
                     color rgb <1.0, 0.2, 0.0>]
        [0.002 0.200 color rgb <0.8, 0.1, 0.0>
                     color rgb <0.2, 0.2, 0.3>]
      }
      scale 2
      translate -1
    }
    rotate -135*x
  }
  plane {
    y, 0
    pigment { color Green }
    finish { ambient .3 diffuse .7 }
  }
The gradient pattern and the transformation inside the pigment are the same as in the example in the previous section.
The color map consists of three colors. A bright, slightly yellowish red that is used for the sun, a darker red for the halo and a dark blue for the night sky. The sun's color covers only a very small portion of the sky sphere because we do not want the sun to become too big. The color is used at the color map values 0.000 and 0.002 to get a sharp contrast at value 0.002 (we do not want the sun to blend into the sky). The darker red color used for the halo blends into the dark blue sky color from value 0.002 to 0.200. All values above 0.200 will reveal the dark blue sky.
The rotate -135*x statement is used to rotate the sun and the
complete sky sphere to its final position. Without this rotation the sun
would be at 0 degrees, i.e. right below us.
|
A red sun descends into the night. |
Looking at the resulting image you will see what impressive effects you can achieve with the sky sphere.
Adding Some Clouds
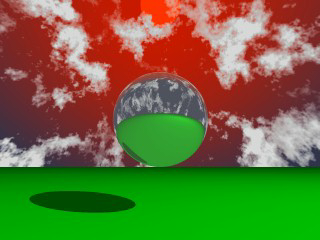
To further improve our image we want to add some clouds by adding a second pigment. This new pigment uses the bozo pattern to create some nice clouds. Since it lays on top of the other pigment it needs some transparent colors in the color map (look at entries 0.5 to 1.0).
  sky_sphere {
    pigment {
      gradient y
      color_map {
        [0.000 0.002 color rgb <1.0, 0.2, 0.0>
                     color rgb <1.0, 0.2, 0.0>]
        [0.002 0.200 color rgb <0.8, 0.1, 0.0>
                     color rgb <0.2, 0.2, 0.3>]
      }
      scale 2
      translate -1
    }
    pigment {
      bozo
      turbulence 0.65
      octaves 6
      omega 0.7
      lambda 2
      color_map {
          [0.0 0.1 color rgb <0.85, 0.85, 0.85>
                   color rgb <0.75, 0.75, 0.75>]
          [0.1 0.5 color rgb <0.75, 0.75, 0.75>
                   color rgbt <1, 1, 1, 1>]
          [0.5 1.0 color rgbt <1, 1, 1, 1>
                   color rgbt <1, 1, 1, 1>]
      }
      scale <0.2, 0.5, 0.2>
    }
    rotate -135*x
  }
|
A cloudy sky with a setting sun. |
The sky sphere has one drawback as you might notice when looking at the
final image (skysph3.pov). The sun does not emit any light
and the clouds will not cast any shadows. If you want to have clouds that
cast shadows you will have to use a real, large sphere with an appropriate
texture and a light source somewhere outside the sphere.
The Fog
You can use the fog feature to add fog of two different types
to your scene: constant fog and ground fog. The constant fog has a constant
density everywhere while the ground fog's density decreases as you move
upwards.
The usage of both fog types will be described in the next sections in detail.
A Constant Fog
The simplest fog type is the constant fog that has a constant density in
all locations. It is specified by a distance keyword which
actually describes the fog's density and a fog color.
The distance value determines the distance at which 36.8% of the background is still visible (for a more detailed explanation of how the fog is calculated read the reference section Fog).
The fog color can be used to create anything from a pure white to a red, blood-colored fog. You can also use a black fog to simulate the effect of a limited range of vision.
The following example will show you how to add fog to a simple scene
(fog1.pov).
  #include "colors.inc"
  camera {
    location  <0, 20, -100>
  }
  background { color SkyBlue }
  plane {
    y, -10
    pigment {
      checker color Yellow color Green
      scale 20
    }
  }
  sphere {
    <0, 25, 0>, 40
    pigment { Red }
    finish { phong 1.0 phong_size 20 }
  }
  sphere {
    <-100, 150, 200>,  20
    pigment { Green }
    finish { phong 1.0 phong_size 20 }
  }
  sphere {
    <100, 25, 100>, 30
    pigment { Blue }
    finish { phong 1.0 phong_size 20 }
  }
  light_source { <100, 120, 40> color White }
  fog {
    distance 150
    color rgb<0.3, 0.5, 0.2>
  }
|
A foggy scene. |
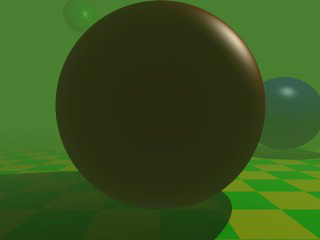
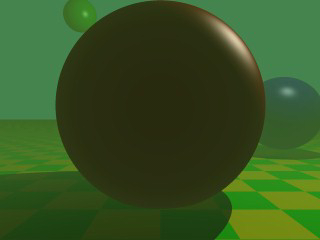
According to their distance the spheres in this scene more or less vanish in the greenish fog we used, as does the checkerboard plane.
Setting a Minimum Translucency
If you want to make sure that the background does not completely vanish in the fog you can set the transmittance channel of the fog's color to the amount of background you always want to be visible.
Using as transmittance value of 0.2 as in
  fog {
    distance 150
    color rgbt<0.3, 0.5, 0.2, 0.2>
  }
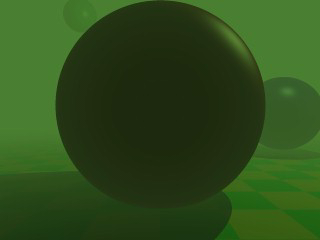
the fog's translucency never drops below 20% as you can see in the
resulting image (fog2.pov).
|
Fog with translucency threshold added. |
Creating a Filtering Fog
The greenish fog we have used so far does not filter the light passing
through it. All it does is to diminish the light's intensity. We can
change this by using a non-zero filter channel in the fog's color
(fog3.pov).
  fog {
    distance 150
    color rgbf<0.3, 0.5, 0.2, 1.0>
  }
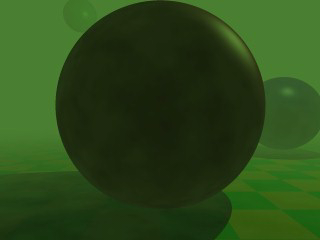
The filter value determines the amount of light that is filtered by the fog. In our example 100% of the light passing through the fog will be filtered by the fog. If we had used a value of 0.7 only 70% of the light would have been filtered. The remaining 30% would have passed unfiltered.
|
A filtering fog. |
You will notice that the intensity of the objects in the fog is not only diminished due to the fog's color but that the colors are actually influenced by the fog. The red and especially the blue sphere got a green hue.
Adding Some Turbulence to the Fog
In order to make our somewhat boring fog a little bit more interesting we
can add some turbulence, making it look like it had a non-constant density
(fog4.pov).
  fog {
    distance 150
    color rgbf<0.3, 0.5, 0.2, 1.0>
    turbulence 0.2
    turb_depth 0.3
  }
|
Fog made more interesting with turbulence. |
The turbulence keyword is used to specify the amount of
turbulence used while the turb_depth value is used to move the
point at which the turbulence value is calculated along the viewing ray.
Values near zero move the point to the viewer while values near one move it
to the intersection point (the default value is 0.5). This parameter can be
used to avoid noise that may appear in the fog due to the turbulence (this
normally happens at very far away intersection points, especially if no
intersection occurs, i. e. the background is hit). If this happens just lower
the turb_depth value until the noise vanishes.
You should keep in mind that the actual density of the fog does not change. Only the distance-based attenuation value of the fog is modified by the turbulence value at a point along the viewing ray.
Using Ground Fog
The much more interesting and flexible fog type is the ground fog, which
is selected with the fog_type statement.
Its appearance is described with the fog_offset
and fog_alt keywords.
The fog_offset specifies the height, i. e. y value, below which
the fog has a constant density of one. The fog_alt keyword
determines how fast the density of the fog will approach zero as one moves
along the y axis. At a height of fog_offset+fog_alt the fog will have a
density of 25%.
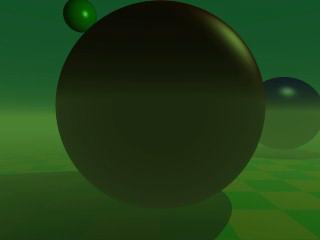
The following example (fog5.pov) uses a ground fog which has a
constant density below y=25 (the center of the red sphere) and quickly falls
off for increasing altitudes.
  fog {
    distance 150
    color rgbf<0.3, 0.5, 0.2, 1.0>
    fog_type 2
    fog_offset 25
    fog_alt 1
  }
|
An example of ground fog. |
| When All Else Fails: Material Maps | Using Multiple Layers of Fog |
|
This document is protected, so submissions, corrections and discussions should be held on this documents talk page. |
